
Finding that your water filtration system has stopped producing water can be incredibly frustrating. You rely on your filter for clean, safe drinking water every day, and a sudden drop in pressure or a complete lack of flow can disrupt your entire household routine. Whether you are using a countertop unit or a heavy-duty setup like the 10 inch Water Filter Housing, understanding the mechanics behind the blockage is the first step toward a quick fix.
In this comprehensive guide, we will explore the most common reasons why your water filter is not pushing out water and provide practical, step-by-step solutions to restore your flow.
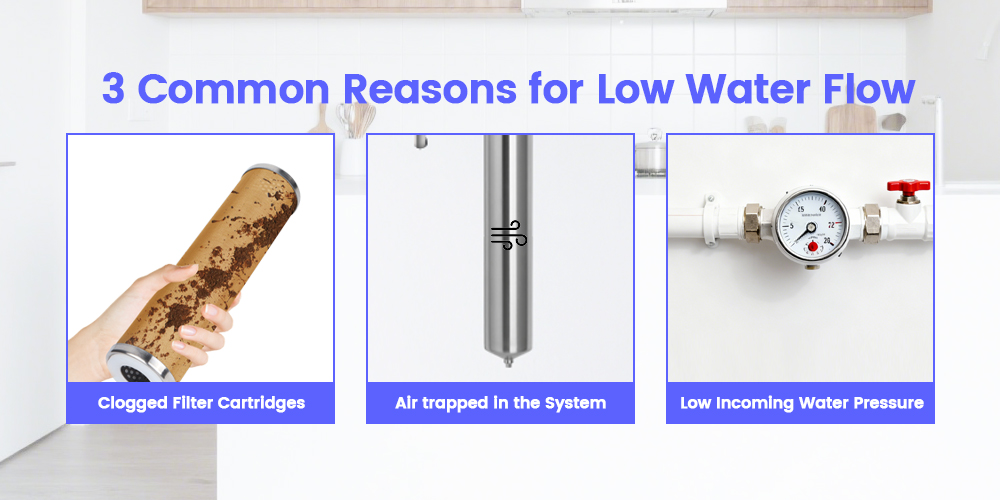
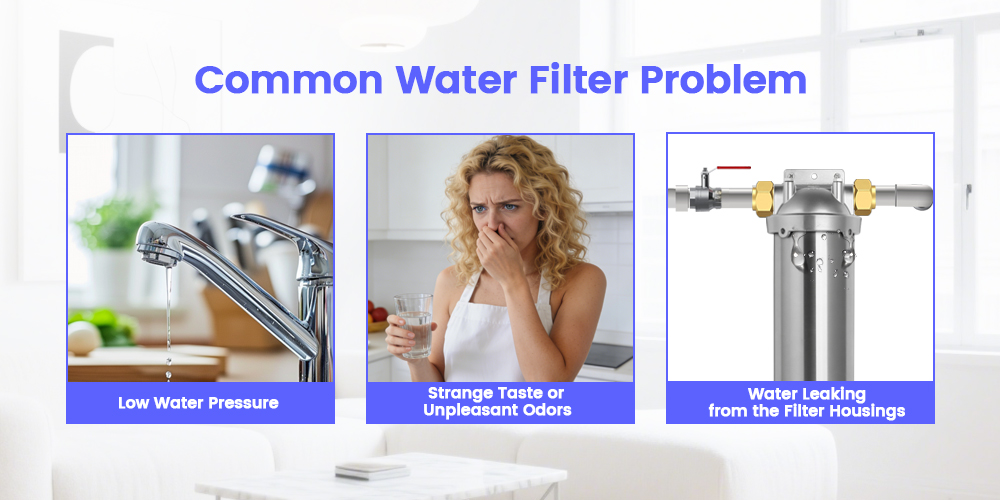
Common Reasons for Low or No Water Flow
Several factors can cause a filtration system to fail. Most issues are related to physical blockages, pressure imbalances, or maintenance oversights.

Clogged Filter Cartridges
This is the most frequent cause of water flow issues. As your filter does its job, it captures sediment, rust, silt, and organic matter. Over time, these particles accumulate on the surface and within the pores of the filter media. Eventually, the buildup becomes so dense that water can no longer pass through effectively.
If you are using a high-quality housing such as the 10 inch Water Filter Housing, the flow rate depends heavily on the condition of the cartridge inside. If the cartridge has reached its capacity, you will notice a gradual decline in pressure before the water stops entirely.
Air Trapped in the System
Air locks are common, especially after a recent filter change or if there has been a disruption in your local water supply. When air becomes trapped inside the filter housing, it creates a pocket that resists water pressure, effectively stopping the flow. This is particularly common in pressurized systems where the air cannot escape on its own.
Low Incoming Water Pressure
Your filtration system requires a minimum amount of pressure to push water through the dense filtration media. If your home’s main water pressure drops due to a leak, a municipal issue, or a partially closed shut-off valve, the filter may not have enough force to operate.
Incorrect Installation or Kinked Tubing
If you have recently installed a new unit or moved your system, a simple physical obstruction might be the culprit. A kinked plastic tube or a filter cartridge that is not properly seated inside the 10 inch Water Filter Housing can completely block the passage of water.
Clogged Faucet Aerators
Sometimes the problem isn't the filter at all, but the faucet it is attached to. Small particles that bypass the filter or dislodge from the pipes can clog the fine mesh of your faucet aerator, creating the illusion that the filter has failed.
How to Fix a Water Filter That Is Not Producing Water
Restoring your water flow usually requires a systematic approach to identify the specific point of failure. Follow these steps to get your system back in working order.
Step 1: Check the Shut-off Valve
Start with the simplest solution. Ensure that the cold water supply valve under your sink or at the main line is fully open. Sometimes these valves are accidentally bumped or not turned back to the full position after maintenance.
Step 2: Inspect for Kinks and Blockages
Trace the tubing from the water source to the filter and then to the faucet. Look for any sharp bends or heavy objects resting on the lines. Straightening a single kinked tube can often restore full pressure instantly.
Step 3: Bleed the Air from the System
If you suspect an air lock, you need to release the trapped air. Most professional housings, like the 10 inch Water Filter Housing, feature a pressure relief button (usually a small red button on the top).
1. Place a bucket under the housing.
2. Press and hold the red pressure relief button until water begins to spray out consistently.
3. This releases the air pocket and allows the water to fill the chamber completely.
Step 4: Clean or Replace the Filter Cartridge
1. Turn off the water supply.
2. Open the 10 inch Water Filter Housing using a housing wrench.
3. Remove the old cartridge and inspect it. If it is covered in slime or sediment, replace it with a fresh Amwater Filter cartridge.
4. If you are using a ceramic filter, you may be able to scrub the outer layer to restore flow, but most carbon and sediment filters must be replaced.
Step 5: Check the Faucet Aerator
Unscrew the aerator from the tip of your faucet. Turn on the water with the aerator removed. If the water flows freely, your filter is working fine, and you simply need to clean or replace the aerator.
Why Choosing a Robust Housing Matters
The hardware you choose for your filtration system plays a massive role in its long-term reliability. A common issue with low-quality, thin-walled plastic housings is that they can warp or crack under pressure, leading to leaks or improper sealings that affect water flow.
This is why many homeowners choose the 10 inch Water Filter Housing. This housing is engineered to handle consistent pressure and is compatible with a wide variety of 10-inch cartridges, including sediment, carbon block, and specialized ceramic filters. Its sturdy design ensures that the cartridge stays perfectly aligned, preventing water from bypassing the filter or getting stuck due to internal misalignments.
Using a standardized 10 inch Water Filter Housing also makes maintenance much easier. Because it fits the industry-standard size, you have the flexibility to choose different types of filter media as your water quality needs change, ensuring you always have the best protection against local contaminants.
Proactive Maintenance Tips to Prevent Future Clogs
• Stick to a Schedule: Don't wait for the water to stop before changing your filter. Depending on your water usage and quality, replace your cartridges every 6 to 12 months.
• Monitor Your Pressure: If you notice a slight dip in flow when using the faucet, it is an early warning sign that your filter is beginning to clog. Taking action then prevents a total shutdown later.
• Flush New Filters: Whenever you install a new cartridge in your AMWater Filter housing, run the water for at least 5 minutes. This clears out air and any loose carbon fines that could otherwise settle and cause a blockage.
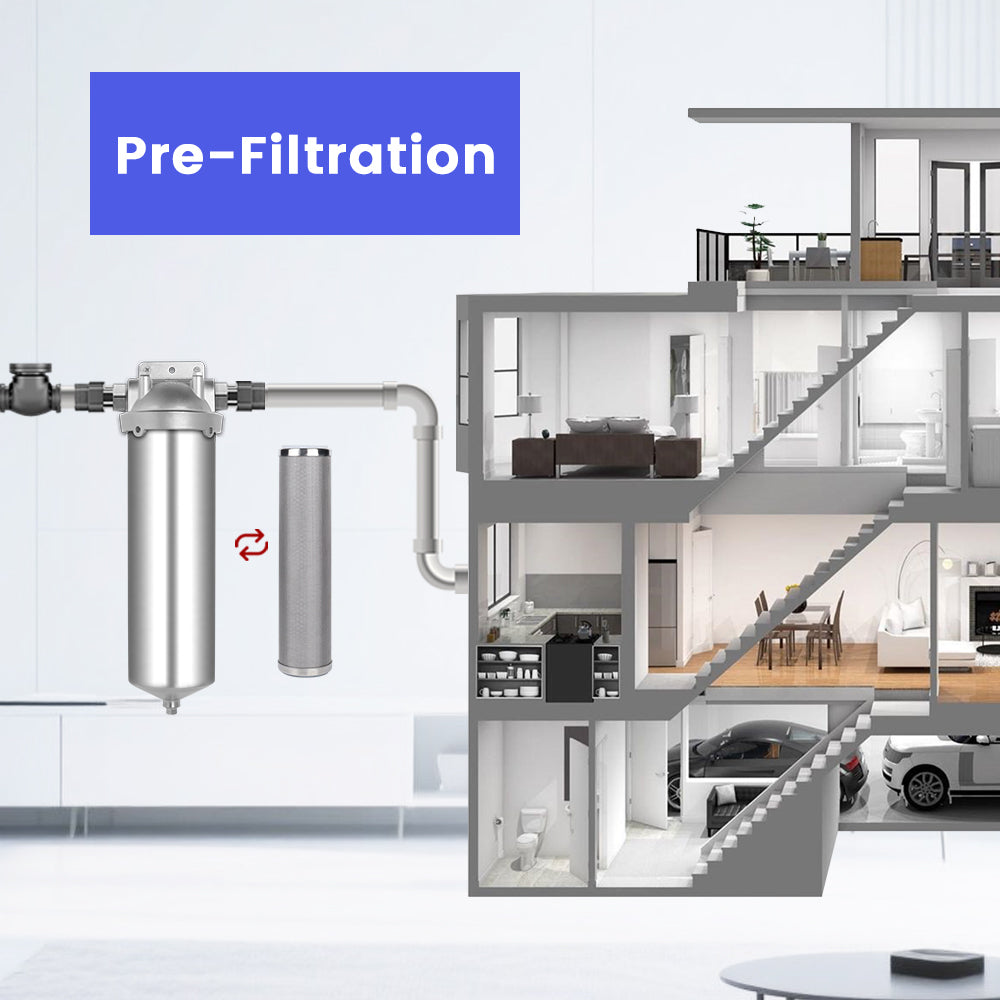
• Install a Pre-Filter: If your water is particularly heavy in sediment or sand, consider installing a dedicated sediment pre-filter before your main filtration unit. This protects your more expensive carbon or ceramic filters from premature clogging.
The AMWater Filter Difference
When you invest in a professional-grade housing, you are not just buying a container; you are buying peace of mind. Our systems are designed to be user-friendly, allowing you to perform your own maintenance and troubleshooting without the need for expensive plumbing services.
If you have tried the steps above and your filter is still not pushing out water, it may be time to upgrade to a more reliable system. Visit our Amwater Filter to explore our full range of filtration solutions and find the perfect fit for your home.
Conclusion
A water filter that has stopped producing water is a sign that the system is doing its job by capturing contaminants—it has simply reached its limit. By checking for air locks, ensuring proper pressure, and maintaining your 10 inch Water Filter Housing with fresh cartridges, you can enjoy uninterrupted access to pure, refreshing water.
Don't let a simple clog keep you from the water you deserve. Follow this guide, check your equipment, and keep your home's water flowing clear and strong. For more technical tips and high-quality filtration products, trust AMWater Filter to lead the way in home water safety.
Leave a comment
This site is protected by hCaptcha and the hCaptcha Privacy Policy and Terms of Service apply.